

Stretching Carpet, Do It Yourself
One of the more common carpet repairs needed, carpet stretching sometimes touted as a do-it-yourself project. For those daring types that would like more information about the process, here is a quick review of the necessary steps and potential pitfalls so you can decide for yourself.
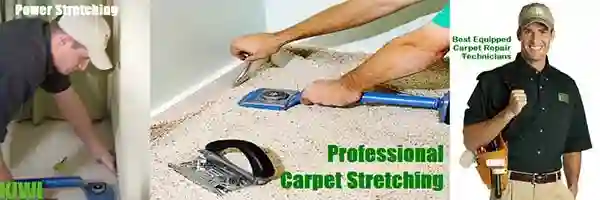
Carpet Stretching Instructions
Carpet ripples are often a sign of improper installation, humidity control problems, excessive use in one area, moving furniture or poor underlayment including a worm pad. Whatever the cause, carpet stretching is a fast, easy fix that will improve the looks and life of your carpet. A typical carpet stretching project includes the following steps:
How To Re-Stretch Carpet
- Carpet Stretching Tools (for the DIY type). You will either need to rent or buy a power stretcher, knee kicker, pry bar, stapler, tin snips and other common tools. Assuming you own most of the common hand tools, plan on spending at least $100 to $125 toward the cost of equipment rental alone. In most instances, by the time you drive around town, rent the equipment and calculate the cost of gasoline etc., it is more cost effective to hire a professional to do the job for you. It often saves time and money in the long run – but then again, you won’t have the fun of learning a new skill!
- Before stretching the carpet, make sure tack strips are correctly installed and secure. Rotted tack strips will not do any good when it comes to securing the carpet, so buy new ones if in doubt. If you need to remove old tack strips, then plan on a few hours of time, patience and a good chisel. You will then need to reinstall tack strips – this can be a little tricky on concrete slab foundations or wood floors with slight imperfections.
- Check the pad while you are at it. It is vital to fix the underlying problem so carefully inspect the padding and installation – but be careful not to cause damage while doing so! The only thing worse than missing the underlying problem is to create a new one while trying to inspect for damage. Carefully pull back the carpeting and pad when examining; pay special attention to fibers – especially if you are working with Berber carpet which can quickly unravel.
- Trim CAREFULLY. Now you are ready to trim the carpet to fit. Remember, you work from the bottom of the carpet, so you are mainly working upside down. Be conservative when trimming – taking too much off at once creates unsightly gaps or causes higher tension that can lead to future buckling.
- Practice First! Using a power stretcher and knee kicker takes a little time to master so practice before starting the main project. You will need to map out the room and direction you will work in before starting. Go through a couple of dry runs first, then take your time and work slowly. Sometimes the pressure of having to return rental equipment can cause people to rush through a job that ends up costing much more in the long run. It is better to pay more than risk ruining your carpet. Take your time and go slowly.
- Just call KIWI Instead! KIWI Services now provides carpet restretching as part of their complete carpet repair services. It’s fast, cost-effective and best of all…you don’t run the risk of ruining an otherwise good carpet. Fully licensed, bonded, and insured technicians can have the job done right within hours. There isn’t a need to spend time and money driving all over town for equipment rentals, dealing with tack strips or moving furniture. Relax and leave it to KIWI – we’re happy to help!
Here’s Why You Should Use KIWI For All Carpet Stretching And Repairs!
- All Carpet stretching and repairs are Guaranteed for One Year
- We will provide you with a Free No Obligation Carpet stretching Estimate
- 33 years of experience in carpet care